..................................................................................................................................................................................................................................................,.........
If you're interested to know more about the tools required for making jewellery, you may want to read up on this article here.
..................................................................................................................................................................................................................................................,.........
Ladies and gentlemen, this is why you are urged to change to stainless steel pliers if you are serious about jewellery making.

This was my first cutter. From the economy pliers range. Think I got this for only RM8.00 or RM10.00. Can't remember but yeah, the budget ones for beginners. Stopped using it for a couple of months when I got my first pair of stainless steel cutter and this was what happened to it in the absence of my 'tender loving care'. LOL
Talking about cutters, I wasn't using a cutter to cut my head pins and eye pins when I first started making jewelleries.
I used this.


I know what you are thinking.'How can?! With serrated jaw some more. Sure gonna marred your wires!'
Erm, well.....can. Why cannot? It's still a plier to cut wires what. I don't know how but I didn't manage to marr my wires. Or maybe I did but I haven't know enough to notice it or it wasn't obvious enough for me to notice it. Which is which, I have no idea. *shrugs* o_O I could still cut the wires off but the problem was I couldn't get a close cut off, for very obvious reason.
Like I've mentioned before, I'm entirely self taught. That means I practically had learn everything from scratch on my own. My best and ONLY resources was the internet. From the tutorials I got from the internet, they kept mentioning about flush cutters.
I asked around but no one around me knew what on earth it was. I had a basic jewellery making book which was a gift from my Sa Kor that shows a drawn picture with a short description of what a flush cutter is and its function. Drawn pictures aren't always as clearly descriptive as pictures of the real thing by the way.
So, what I did was to give my mum that book and asked her to bring it along to a hardware store to show them the picture to see if they knew anything about it. Well, guess what? They don't! All they could answer was they don't sell them. The problem with living in a small town, I tell ya.
My mum ended up getting me that plier from some RM2 shop!
Nevertheless, that plier survived with me through my first 6 months of jewellery making until I found someone on eBay Malaysia selling the now-rusty cutter that I have.
Oh, well.... talk about ignorance. But that was 2 years ago. :)
I'm no longer using this plier. However, I still used it to cut memory wires. Memory wires, if you haven't know, is much harder than jewellery wires. You'll spoil your cutter if you use it to cut memory wires.
Spoil in the sense that you may blunt the cutter. It's the same principle as with the scissors. You should know that scissors used to cut fabric, hair or paper should only be used for their respective purposes and cannot and should not for whatever reason be used inter-changeably. Try jumble-using them and you'll end up with scissors which can no longer cut. It's really a waste, especially if they are expensive ones to begin with.
How do I know these? Well, I have an aunt who used to be a seamstress and an aunt who used to be a hairdresser and they had always been very particular with their scissors.
So, apart from knowing how to use your pliers, you should also know how to care for them. So, don't use your cutter to cut memory wires. It will spoil your cutter. They do have a specialty tool used only to cut memory wires but a frugal artist like me will say it's not necessary. Specialty tools usually mean that they are more expensive and less versatile in terms of usage.
I think any of the pliers used to cut wires will suffice. Those that you could perhaps easily found in the toolbox of any household, like the one I used above, maybe?
So, anyway, back to cutters.
Here is a picture of all the three cutters that I currently have with me.

Now, a close up of three jaws for the sake of comparison in sizes.

Let's just forget about the one on the right since it has already gone rusty and not usable anymore.
I'll just compare the two stainless steel ones because as you can see both the jaw shapes are obviously very different.
I haven't been too satisfied with the now-rusty cutter when I was using it for the past two years simply because I felt that it couldn't quite give me the close off cut that I wanted.
So, I was quite happy with the stainless steel one that I got earlier this year. That is the one in the middle. As you can see the, the shape of the jaw is sharp and pointy and it somehow appears to me to be capable of very precise cut.
Well, it did. My only complain is the size of the handle grip. It's a bit too small hence causing some hand strain. That was before it got blunt and it just pisses me off that it got blunt so soon and I was already on a look out for a pair of new stainless steel pliers.
That was how I ended up getting the new set of stainless steel pliers from Beading.com.my recently.
Below is a close up of the two cutters side by side.


As you can see from the two pictures above, the pointed jaw from GT tools does in fact give the impression of a more precise cut. So, when I received the more rounded jaw cutter from Beading.com.my, I was a bit worried of its performance.
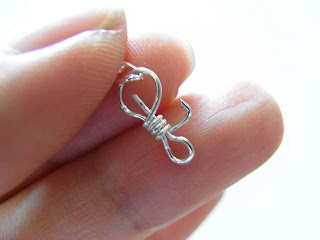
So, I put the cutter to test. The time when I needed a more close off cut is when I'm making the eye for the clasp because I needed a close cut-off of the excess wires from the eye.


Now. the other side of excess wire.


Very satisfied. :)
A very satisfactorily close cut-off.
But then, of course. The cutter is made in such a way that there's a hollow at the back of the blade which allows for the closest vicinity to the target. So, surely can get a close cut-off in spite of the size! Nevertheless, I somehow still prefer GT Tool's jaw design.

Oh, another thing......

There is however one thing that has been tugging at my neck. No major defect, but just a little something that I wished that it wasn't so.
You know how sometimes the clothes' label at the collar of you shirt itches the back of your neck. It's not considered as a defect with the piece of the garment but you nevertheless wished that they didn't make that label such that it feels like it's poking from behind of your neck.
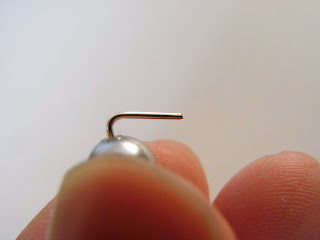
For reasons that I do not know, the pair of cutters from Beading.com.my cut off slantingly at an angel. Don't know why is that so.


I'm not sure if I managed to capture it clearly in the picture but try comparing it to the cut off using GT Tools in the picture below.

See any difference?
And the strangest thing I notice is that if I turn the cutter the other way around with the flat side facing inwards, facing the bead, then......

I get a nice cut off.

Why? Because the slanted cut-off side is now at the other part of the wire.

So basically, the wires towards the hollow side of the cutter will be cut off diagonally. Strange isn't it? How come? Is this how it is supposed to be? Did anyone experience this before? Could it be me who has been using the plier the wrong way?
But of course, the pair from GT Tools is a bit blunt now so it might have an effect on the cut as well but if I'm not mistaken, I think that during the initial use, there might have been instances that I had noticed that it cut off in an angel as well but the angel was not slanted to such a degree which made me wonders the way I am wondering with the pair of cutters from Beading.com.my.
Anyway, it's not really a big deal lar because at the end of the day the edges will be hidden after you make the loop anyway.
But....... it becomes a nuisance (well, to me at least) when I make my own jump rings.


Now, look what happens when I close the ring.


That's why lor......
So, when I make jump rings, I use GT Tools but when I do the ordinary cut, I use the one from Beading.com.my.
The search for the perfect cutter continues.......
p/s: I think I need to get a wire rounder.


0 hollers:
Post a Comment