

Hello, folks! Haven't been updating for a while. So, how is everyone doing there? Lovely, I hope! ;) It has been quite a month for me so far!
Anyway, to kick start the jewelry making urge again, I share with you here how to make your own fancy toggle clasp. Well, the fancy part is where you can use beads to decorate it but if you ask me. I think it's more like a quick and easy one compared to the earlier one that we did before.
If all the tedious wire wrapping work is not for you, then you just might like this one. :)
Here is what you'll need.
Apart from the usual stuff,

You'll need, additionally, beads of your choice. Here, I'm using size 7 seed beads but it's up to you, really.

Cut out approximately 5" long of wire.
Talking about wire, one thing to note is to use a thicker wire here since you'll only be going around the mandrel only once in which case you'll need a thicker wire for sturdiness but yet not so thick that your beads can't go through it. Any wire size no less than 20 ga or 0.8mm should be okay.

Leaving about 1 1/2" tail on one end of the wire.

And make this kind of loop. Yes, I'm calling it this kind of loop because I can't think of a name to call it. =P
Anyway, I shall not be repeating myself again. For a detailed instruction on how this is done, please visit here.

Right, after you've made this loop. Grip your chain nose pliers onto the longer end of the wires, gripping it very close to the bottom, leaving just enough space for you to wrap 'neck' later on, and make a right angle bend.

Decide on the size of the ring that you want to make and place the ring mandrel on top of the longer wire end. You'll be wrapping the longer wire end around the mandrel.

Pushing the mandrel very close to the base..... (you might find that the shorter end of the wire 'forced' to move to the sides and no longer aligned in a straight line but that's okay because it can be rectified later on.

Wrap the longer wire end around the mandrel once.

Remove the wires from the mandrel and this is somewhat how the wires will look like. A bit distorted, I know but fret not cuz we are going to reshape it.

Using your fingers, of course! :)

Just move the wires around a bit so that they are aligned correctly.

Tadah! :D

Next, just slide the beads of your choice onto the longer wire end forming the ring.

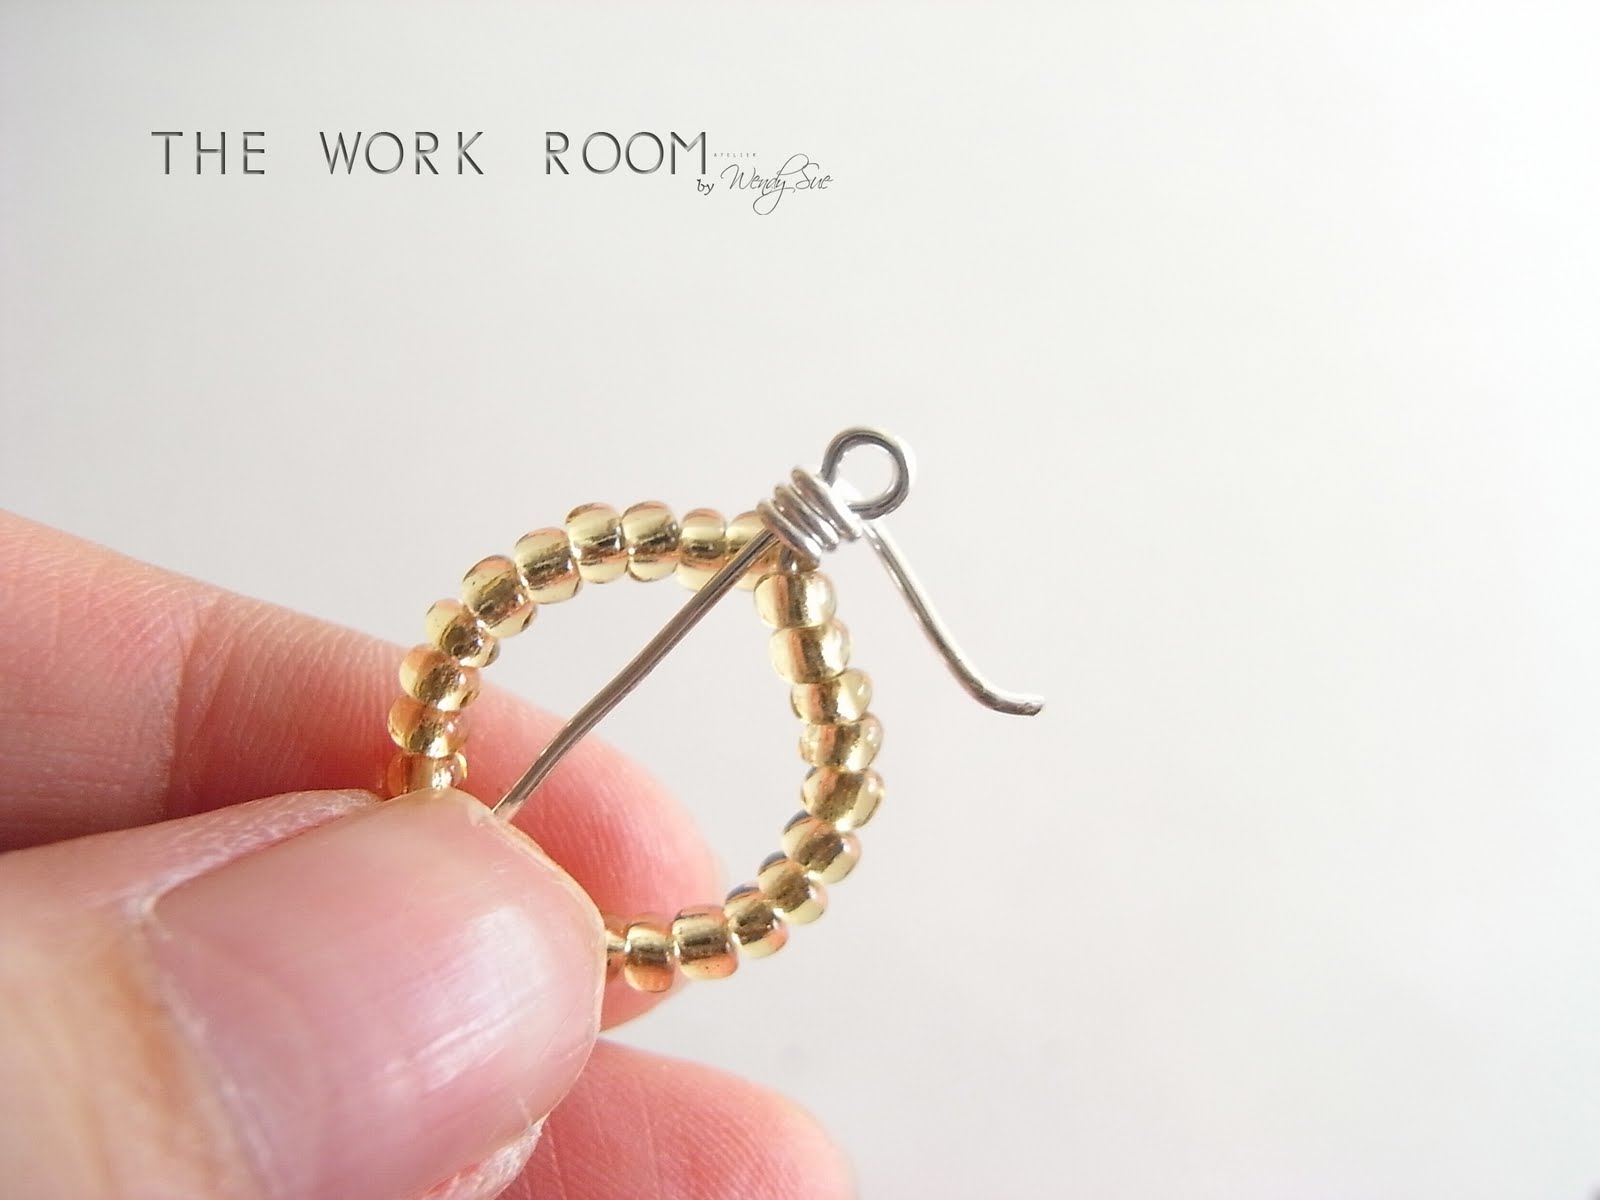
Now, make sure you get the beads right down to the base but yet you should leave enough space for you to wrap around the 'neck' so that the beads are wrapped tightly within the circle.

This is what I mean by getting the beads as far down to the base as possible.

But also leaving enough gap in between for you to wrap around the neck.

Wrap the longer wire end around the 'neck' and the shorter wire end.
And cut off the excess wire and you're done!

That's quick, isn't it? ;)
Part II here.

0 hollers:
Post a Comment