About The Work Room

The Work Room is the Creative Journal of Wendy Sue where she shares her creative journey in all things handmade. The Work Room also offers an alternative to your typical jewelry making workshops. Scroll down to the end of the page to see how you can learn to make your unique piece of artisan jewelry online.
Showing posts with label Read Me First. Show all posts

Wednesday, 6 March 2013

Introduction to Right Angle Weave (R.A.W.)


So, I get this question every now and then on whether my tutorials uses 'cross weave'. So, I thought it apt that I write a post on this subject. (Actually, I wrote about  this before, just not here. I can't believe I've not touched on this topic before here!)

Yes, I use mainly the 'cross weave' technique or what some might call it as two-needle
Right Angle Weave (R.A.W). However, in my very early stages of doing R.A.W, I used to Use
the one-needle R.A.W but once I learnt about the two-needle one, I've not look back ever since.

The pendant above was actually one of the few earliest project I did on R.A.W. which I thought was rather easy to follow and understand. I reckon most of you would have been familiar with this stitch already but for those of you who have not tried making jewelry before, you might want to give this a shot. I've always think this to be a very simple yet effective project.

Before i jump straight into the project and also for the benefit of those not in the know, let me share with you my interpretation of what is a 'cross weave'.

Now, I use this phrase a lot --> "Cross both thread ends at ......"


This is the literal way of explaining the position of the thread for this stitch. Now, what happens is both the ends (hence, the two-needle idea) of a thread crosses in the opposite directions through the beads.


I will zoom out a little to show you the bigger picture. It is normally done in sets of four beads but it can also be more than that, but that's another story.


So, what happens as you pull the two thread ends in the opposite direction is the bring all the beads close together and more often than not, in a full circle.

Alright, now that you kinda get an idea what it's about, let's give this stitch a try.


Okay, first things first. You will need:

  • (8) approx. 5X8 mm rice shaped freshwater pearl
  • (4) 5mm Swarovski bicone bead
  • Fishing line
  • Scissors


Step 1
Cut out approximately 50cm long fishing line and string on 1 pearl, 1 bicone, 1 pearl and 1 bicone


Step 2
Cross both thread ends at the last bicone bead you added. You will see that the beads now form a circle, or rather rectangular-ish since the 4 beads form 4 sides.


Step 3
String on 1 rice bead and 1 crystal bicone on the left thread. String on 1 rice bead on the right thread.


Step 4
Cross both thread ends at the crystal bicone.


Step 5
Repeat step 3 and 4 one more time.


Step 6
String on 1 rice bead on the right thread and bring the thread end down and pass through the crystal bicone right at the bottom.


Step 7
Repeat step 6 on the left thread.


Step 8 
Pull tight and you will see the barrel forming.


Step 9
Bring the right thread up and through the rice bead, to the left through the crystal bicone and down through the rice bead so that the two thread ends meet.


Step 10
Tie a knot and you're done! Well, not quite. :) There's still some finishing off to do!

We need to end the threads and it's not like we can cut off the excess thread just like that. Even with a knot, the material of the fishing line itself is such that the knot will tend to 'slide' open if left in the 'open'.

So, this is what we need to do.


Step 11
Pass both thread ends through the surrounding beads before cutting off the excess. There's really no rule on how you should pass the thread around but as a rule of thumb, if there is one, pass it through along the thread path and the more beads you pass through, the more secure it is. And passing the thread in a 'zig zag' fashion will be more secured than say, in a 'straight' fashion.

Did I hear a "Huh?"

LOL .... okay, that's another story I'll leave it for next time.


Alright, back to finishing off the threads. Like what you see in the pictures above. I started with passing both threads down through the pearl bead. And you can continue by passing through the bicone bead on the right and thereafter the pearl bead below it on the sides and on and on,  up to you.

But since this Is only a small project/object, I think I'll just stop here and cut off the excess.

For the technicality of finishing off thread, you can refer to this post here.


Now, using the same stitch, try experimenting with different sizes and shapes of bead and see how it turns out to be.

Have fun! ;)


post signature

Read More...

Wednesday, 26 October 2011

Adding New Thread


I was asked  on how I add on new thread to a particular project. So I thought I would do a post on this topic. I think this concept works the same across the board, regardless of what project it is.


So, when do you add new thread?

It's quite subjective. Some people feel comfortable working with shorter lengths of thread but some people would rather work with longer threads to avoid the hassle of adding new thread. But if you ask me, adding new thread is unavoidable is you do bead weaving. At some point, you would need to add new thread.


There are many ways that you can add on new thread but generally, there are two things I consider when it comes to adding new thread :-

1. The type of stitch I was doing; and
2. The type of stringing material I was using.

In my case :-

1. Since I do the two-needle R.A.W (some are more familiar with it as the cross weave) most of the time; and
2. Use fishing line all the time

this is how I always add on new thread.

I also used to do some other stitches like peyote (or some refer it to gourd) stitch where I used a different way to add new thread, but that's another story.


How I do it is very simple, really.

What I do is finish off the old thread by weaving it back into my work like how I would normally end a project before adding on the new thread at the point where I stop to finish off the old thread earlier on.

First thing first, at what point do you stop to add new thread?

Two things I do :-
1. Make sure you leave enough tail; and
2. Stop at the point where both thread end crosses.

Make sure you leave enough tail for you to weave back in. It's up to you really at which point you think want to stop your work to addI leave a minimum of 3" long thread. You don't want the thread to be too short because not only longer thread will make your work easier but also more secure. On how it makes it more secure, I'll explain it in a while.


Well, if you are doing a cross weave, every step ends with both thread ends crossing. So, at what point do I actually stop? Well, this has a rather relative answer.

It depends on the project on hand but what I normally do is to stop at the point where I consider it to be a 'secure point'. Which is the point that I consider to be the 'secure point'? But a good guide can be when you are done with one 'cycle of repetition'.

Take the project in the picture for example. It actually has a base row that I then embellished with additional beads on top of it. So, if you ask me where I think would be the 'secure point', I would have to say that it's the base row after it has been embellished with additional beads.


Here's a look at the base. You'll see that I have pass the thread around so that the two thread ends meet (individual thread path shown by the blue arrow).


Just like how you would finish off any piece, you are going to tie a knot between the two thread ends and the weave both thread ends back into your work again.


Now, the further you weave back into your work, the more secure it is, which explains why a longer tail end is needed earlier.


Two things to take note of at this stage.

1. Where you end with the know. Remember earlier when I explained how that the knot is hidden in the bead hole when you finish off your work? So, wherever it is that you decided to knot, make sure that no more thread will be passing through that bead where the knot is hiding or you will have difficulty passing the thread through because the knot is already blocking the thread path!

2. As you are weaving your thread back into your work, make sure that it is done in a 'zig zag' manner i.e. don't weave them back in a straight path but rather pass the thread through the beads up and down. It's the turning 'angle/corner' that will secure the position of the thread path. Get what I mean?


Turning back to the front, it looks like the ends are finished off already but we are going to continue.


Cut out a piece of new thread and pass it through the bead where you decided to stop earlier on, In this case, it's the bead on the edge at the base. And continue weaving.

Well, that's how I do it, regardless of what project it is. It's still the same principle. :)

Hope this helps!


post signature

Read More...

Wednesday, 16 March 2011

Close That Perfect Ring


Well, ok, to be honest, I don't know what makes a perfect ring but have you sometimes experienced the difficulty of closing a jump ring?

It's like no matter how, there's this little gap hanging, which I think is rather common in 'cold connection' cases.

Alright, just in case you are wondering, 'cold connections' means no heat is involved in connecting pieces together. In traditionally silversmithing, jump rings are meant to be soldered in which case there's probably not such a big deal with minor gap. I think!

Anyway, this is something I picked up during the Beginners' Silversmithing class. Well, it wasn't taught to me literally but just something I observed and reckon how it's done.

So, okay, in circumstances like this, what you do is to reopen the ring.


Alright, now I give you a top view of how it's actually going to be reopen.


As you open the ring as you normally would, at the same time, apply pressure on the sides by pusing the two ends towards each other.

In other words, as one hand pushes one side of the jump to the back and another hand pulling another side to the front, simultaneously with the strength of your palm pushes the two sides towards each other.

I'm not sure if I'll be able to make them clear in words but I did try with drawing arrows on the picture which I hope would be better illustration.


What we're trying to do is kinda to get the ends to be slightly overlapping on each other.


Compared to how we would normally do it where both ends are more or less in tandem with each other?

Now, try closing it again.


As you pushed the two sides closer to each other, you'll see that the two ends of the jump ring overlaps, but that's ok. Just try to 'push it in' nonetheless.


And you should be able to 'get rid' of the gap.

And now, back to the front view.


There you go!


Hope this works for you like it did for me. :)


post signature

Read More...

Sunday, 27 February 2011

Ending Right Angle Weave (R.A.W.)


There are probably a few ways you can end a Right Angle Weave (R.A.W.) especially depending on the type of stringing material you use. Since I almost exclusively use fishing line and two-needle R.A.W for all my beadweaving so this article is actually about ending R.A.W with fishing line.... or monofilament....or.... Supplemax .... well, or those similar to these.
Phew! That's quite a mouthful.

Now, my ending sentence in any beadweaving project is always this :-

" Pass the thread around so that the thread ends meet. Tie a knot. (well, you will need the two thread ends to meet first before you can tie a knot, can't you? :P) Pass both thread ends through your work again to reinforce the knot before cutting the excess thread off "


So here's the thing abour fishing line. Thing is even after you have tied the knot, the knot can easily come loose even without you realising it.

Sure enough you see me loosening the knot here with the help of a needle but what I'm trying to say is that it can heppen. I think it's largely to do with the material of the fishing line itself which has a smooth and glossy surface which it can easily slips and untie itself.


Therefore, if you were to cut ff the excess thread right after the knot, you might find the knot loosen and untie itself and your whole piece of work will just 'crumble' and fall apart.

Now, THAT's something I bet you don't even want to even imagine about!

So, this is actually what you do or the 'mechanics' behind it, so to speak.

Now, after tying the knot........


You are going to pass both the thread ends through any bead next to the knot. Any bead will do but it should be the one immediately next to the knot.


Now, this is what happens as you pull the thread through. You'll noce that the knot will also be pulled towards the hole of the bead as you pull the thread through ......


..... until the knot is hidden inside the bead hole. You will continue passing both thread ends through a few more beads before cutting the excess off.


This gives a nice finishing to your work where the knot is hidden from view and not to mention also since the knot is nicely tucked inside the bead hole, is less likely to untie itself and is therefore secure.

Bear in mind though that after the knot, both thread ends should pass through the same bead in the same direction to successfully tucked the knot in the bead. It can't be say, one thread ends pass through the right and the other pass through the left. Both should pass through either the bead on the right or left.

So, yeah, that's basically how I normally do it. But of course if it's a one-needle R.A.W, this cannot be done since you have only one tail end and you can't really tie a knot with one thread.

Well, of course you technically can tie a know even with only one thread but then I don't think that's how they do it. Well, more on that next time. ;)


post signature

Read More...

Monday, 27 December 2010

One-Needle or Two-Needle Right Angle Weave (R.A.W)?


If you have been following the tutorials that I've written so far, you would probably notice that I do a lot of R.A.W. That's Right Angle Weave for those who is unfamiliar with it.

Right Angle Weave (R.A.W.) is the basic stitch used for Japanese style beadwork. It is si named because of the way the beadslie at right angle to one another.


It is one of the easiest stitches to learn  and a very versatile weave. The same stitch using a combination of beads of different sizes and shapes will yield different results.

So, exactly where does the needle comes in?
Well, there's no needle literally involved here. It's just a figure of speech.

Emm, to think about it, not really too.
Depending on your thread of choice, you may or may not need needle. 

For example, say if you're using nymo. Because the nature of the thread is such that they are rather soft and flimsy, you'll no doubt be needing needle to help you work the thread through the beads but if you're using fishing line/monofilament/Supplemax or amything else to the equivalent, you do not need needle.


The fishing line is really my favourite choice of thread for a couple of reasons :

I used a lot of Swarovski crystals and crystals if you havent' know by now have very sharp edges around the bead hole so much so that they tend to cut through threads like Nymo. Can you imagine thr frustration say if the work is 2/3 done only to find out that the thread got cut off thereafter. But in my case, I'll be just as frustrated even if I'm only 1/3 through!

Fishing line is a lot more stronger and automatically eliminates the use of needle.


The ends of the thread are in itself strong enough to act as the needle, guiding and working the thread through the beads.

So then, what is this one needle and two needle about?

Alright, before I actually come to the understanding that the R.A.W. and Japanese style beadwork are pretty much similar if not the same, I was learning it the one needle way.

It was only later on did I realize that it can be done much faster and easier using
two needle i.e the Japanese way.

The two method starts off pretty much the same. Here's how.

First off, you'll need four beads.


Then, string all four beads onto the thread.


Next is where the 'right angle' happens. I'll show it to you slowly.

You're going to bring the right end of the thread end up to cross at the first bead from the left. This is where I'll usually phrase it as 'cross both thread ends at the bead'.


It is also often referred to as cross weaving because
the threads cross in opposite directions through the bead.

Erm, let's take a detour to illustrate this. I'll be using one bead to illustrate the 'crossing'.

Picture a bead with a hole running through from left to right,
or, well, right to left, whichever way suits you. :P


And you'll have each of the thread end on each side of the bead and each will enter and pass through the bead in opposite direction like this.


See how the 'crossing' happens now?

Alright, continuing where we left off......


As you pull the thread tight to bring the beads closer to each other, thos is how it will turn out.


That forms the first 'segment' of the R.A.W.

Before I continue with how you are going to go on from here using one needle and then two needle, I'll first tell you what's the difference between the two.

Well, basically, the two method starts of the same as above. It is the following steps that makes one needle different from two needle. But having said that, one starting point to take note is the tail of the thread ends.

What it means with one needle R.A.W. is the fact that you only work with one thread end throughout, which is why you'll leave one side of the thread end much longer than the other.


As you can see from the picture above, we'll only be working with the longer thread end on the right to weave the thread through the beads whereas we keep the shorter end on the left (not necessarily THIS short) alone, maybe for adding on clasp or whatever later on when we've somewhat finish.

Two needle R.A.W. on the other hand leaves somewhat equal length of thread ends on each side.


I know the beads look really small and faraway here, but then again, the focus is on the thread path 
rather than the beads. So I guess it's more like to have a bird's eye view of the thread path. :P


Well, if you think about it, it only makes sense to leave similar length of thread on each side since for two needle R.A.W., you'll be working with the two thread ends simultaneously.

Having work out the similarity and difference in the starting point of the two method, we'll now delve into each method separately.

Okay, let's start with the one needle first.


One-Needle R.A.W.

I'm repositioning the placement and I'll explain why.


It is exactly the same as how I started off just now. A recap of the earlier one.


What I did was merely flip and move it around so that the bead with the threads crossing is on the left instead of the top and the shorter tail end is towards the top instead of the left. Nothing rocket science here. :P

Alright, I'll explain why I position it this way and for that we'll go back to the earlier picture.

Let's assume that I'm going to make a bracelet. So, the red arrow shows how I'll be using the shorter tail end to join it to the bottom to connect the clasp and the green arrow shows that I'll be working with the longer tail end from left to right to construct the bracelet.

Now, we shall agree that we are going to leave the shorter tail end alone for now and only be working with the longer tail end. Therefore,'the thread' that I'll be mentioning henceforth actually refers to the longer tail end.

Step 1 :
Now, pass the thread to the right through the bead and then up as shown by the green arrow.


Step 2   :
To continue constructing the next 'segment' of the bracelet, string on 3 more beads onto the thread. The following segments normally adds on 1 bead lesser than the previous 'segment' because between two 'segments' will always share one common bead.


Step 3 :
Then, bring the thread up through the bead where the thread is coming out from.


The thread before you added the three purple beads was coming out from the pink bead. And now we'll be passing the thread through the same bead after adding on 3 more beads.


Pull the thread tight......


And you get the second 'segment' formed.

Step 4 :
To construct the next segment, pass the thread to the right and then down as shown by the green arrow.


Step 5 :
Then, you'll do as in step 2; string on 3 more beads.


Step 6 :
And just like step 3, to bring the thread through the bead where the thread was coming out from.


Step 7 :
Before you can continue constructing the following 'segment' by adding another 3 more beads, again you'll need to reposition your thread as shown by the green arrow thread path.


You'll be repeating step 2 through 7  to continue with all the following segments.

Notice that the starting point of each segment is parallel to one another? Which is why we always have an additional step of repositioning the thread (i.e step 1, 4, 7) before we add any more beads to make the next segment. The 'parallel' beads also happens to be the common bead shared by two 'segments'.

The example shown here is to bead a linear strip from left to right which is why you'll find the common beads are parallel to each other in a left to right manner.

And that, folks, is how one-needle R.A.W. is done. Now, on to the two-needle......


Two-Needle R.A.W

Some people find the two-needle method a bit complicated and confusing but two-needle R.A.W is actually my preferred method. All my R.A.W. work are done entirely using two-needle; or two simple reasons:

1. It's straightforwards; and
2. It's fast

The repositioning of thread in the one-needle method tend to get a little tedious for me
and even confusing at times.

I like how working with two-needle pretty much cut the working time down to half! Well, I've never really timed it but it sure did felt that way!

Okay, this is how two-needle way is done.

You start of as with the same way as you start off with the onne-needle way but the difference is you leave the thread ends on each side of somewhat equal length.

I used the word somewhat because it's not rocket science and therefore does not have to be dead precise of exactly equal in length. It's just logic. If you're working both thread ends simultaneously, you would expect same amount of threads used on each side. But then again, you won't be penalised for not having exactly the same amount of thread on each side but I can tell you, you're going to have a headache if one side of the thread is coming to the end and you have enough thread on the other side AND you're only halfway through your work! Like, serioulsy......... =P


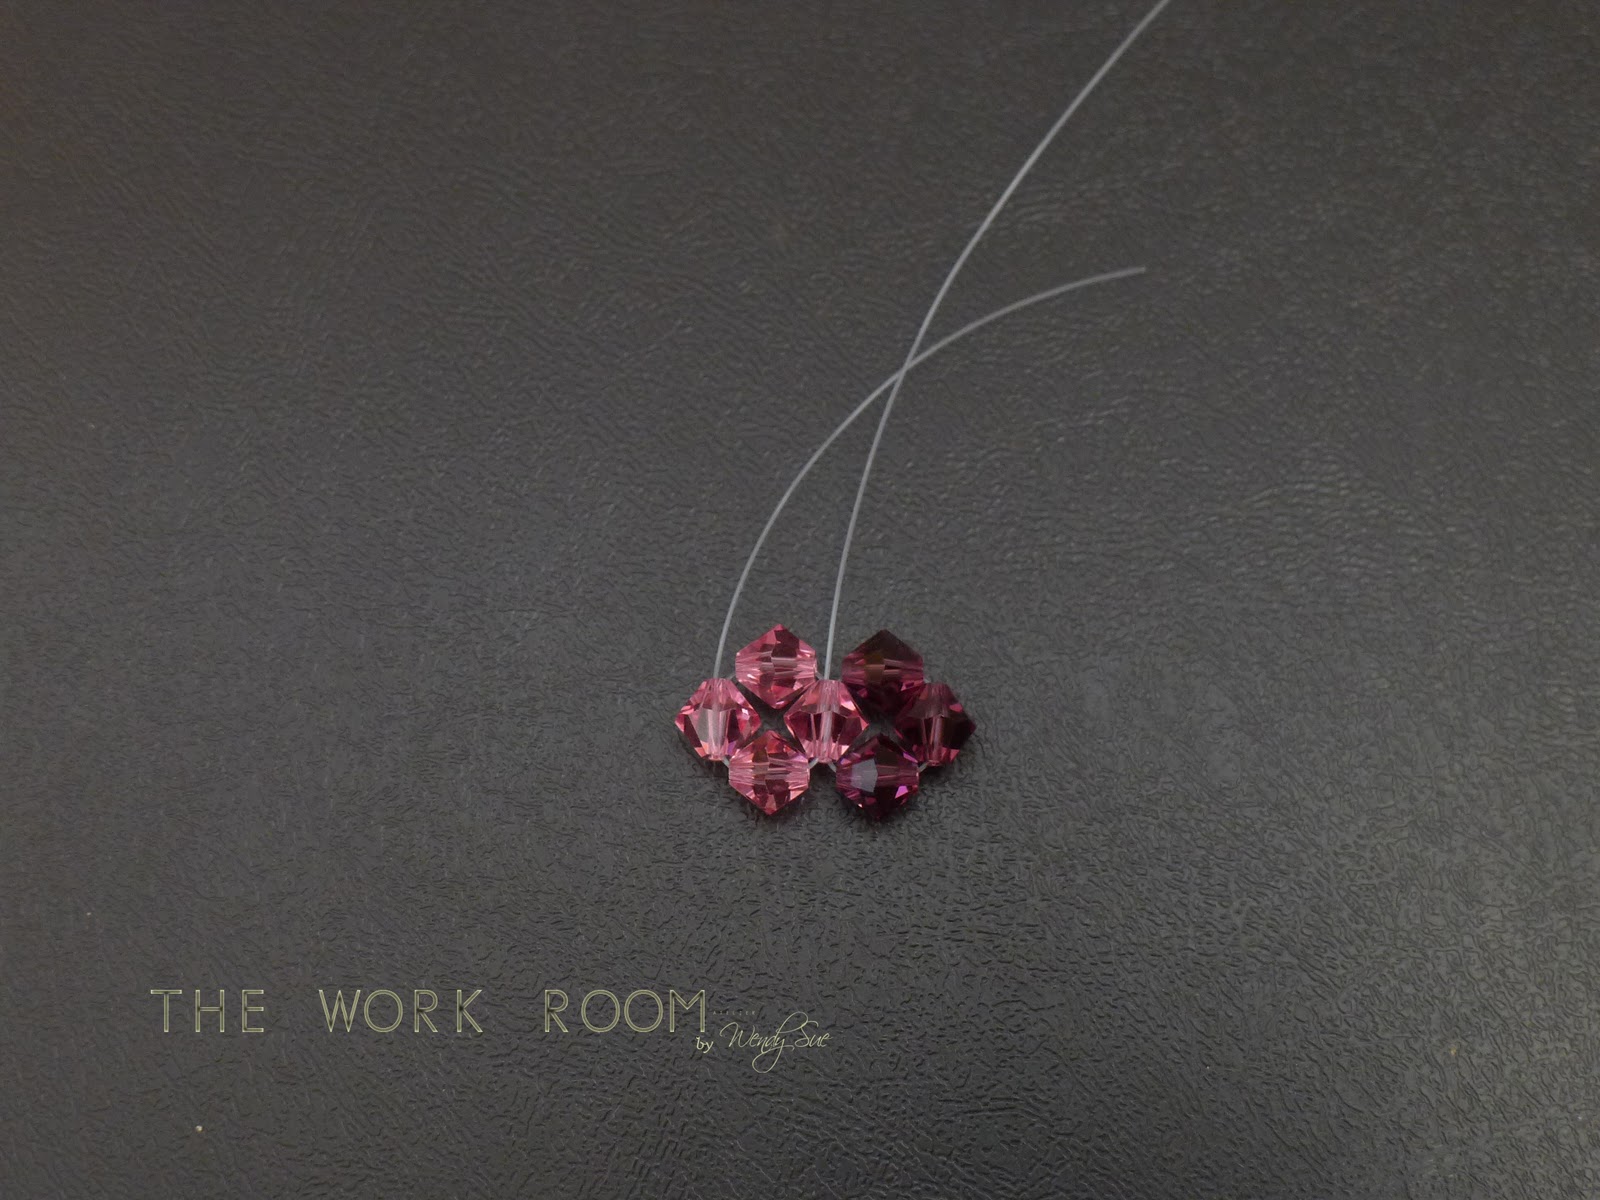
Similarly, we're going to bead from left towards right direction and the bead where the two thread ends are coming out from (a.k.a where both thread ends crosses) is the 'common' bead.

Step 1 :
Just like in one-needle method, we're adding 3 beads to form the next segment but when it comes to two-needle, you need to divide these 3 beads between the two threads. Therefore, you'll string on 2 beads onto one thread and 1 bead onto the other.


It doesn't really matter which thread you added 2 or which one you added 1 since either way,
it will still end up the same.

Step 2 :
Now, this is how you'll see the next 'segment' is formed.

You will have the two thread ends crossed at the 'extra' bead. What is meant by the 'extra' bead here is the additional bead.


Remember that we're working on two threads simultaneously and therefore, things have to be somewhat equal? Equality beckons that each thread end carry the same number of beads. So, technically, there should only be one bead on each side and so that whichever more than that is the 'extra'. Hence, that last bead on the thread at the top is the 'extra' and you'll need to have the two thread ends crossing at that bead.


See how the two threads are crossing at that 'extra' bead?


You will continue repeating step 1 and 2 until the end or you reach the length that you want.

But just for the fun of it and to show you how it doesn't really matter which thread carries the 'extra' bead because it will still end up the same, I have the extra bead at the bottom thread this time.


Remember, 'crossing' happens at the 'extra' bead.


So, alright. I flipped the pictures around. :P But it doesn't matter because that is EXACTLY how it WILL BE like. :P So, the point remains that it doesn't really matter where you add the 'extra' bead.

Pull the thread tight......


See? You still end up with the same thing! :) In both sense, i.e. with regards to on which end you added the 'extra' bead and whether you do it the one-needle or two-needle way.

Having said that, does it mean there's no difference at all between the two; i.e. one-needle or two-needle? Well, if you ask me, it' s yes and no. In what sense it's a yes and in what sense it's a no?
.
.
.
.
.
.
.
.
.
.
.
.
.
.
.
.
.
.
.
.
.
.
.
.
.
.
.
.
.
.
.
.
.
.
.
.
.
.
.
.
.
.
.
.

:)

post signature

Read More...

Related Posts Plugin for WordPress, Blogger...