..................................................................................................................................................................................................................................................,.........
If you are interested, here is the article that I first came to learn about the EV. Although it also talks about white balance but I hardly adjust them for my need. I had mine set to auto and it has been working just fine for me.
..................................................................................................................................................................................................................................................,.........
Photography does seem to be the trend these days, isn't it? You can almost see everyone picking up photography as their hobby and some even turning it into a part time source of income, which if you think about it comes in really handy in times of economic recession like these, where people want to cut cost in giving up the professional photographers which comes with the 'professional' charges and amateurs sure can do with some extra income! (Phew! That's quite a mouthful there!)
Some of these amateurs photographers is just as good as the professional ones, if not better, mind you. But of course, those DSLR (I think that's what they are called) cameras makes it all the more possible these days. LOL....
 Even my cousin bro is doing this part timely and wouldn't even mind changing profession if the returns were more than satisfying! Anyway, if anyone in Malaysia is interested, do let me know and I'll pass you his number. Don't worry, he won't cost you a bomb and he's very good! ;)
But then, of course, those are not the type of photography that I want to talk about. To be honest, I know nuts about photography! And neither do I own a DSLR camera which is so capable of taking super nice pictures. I'm only concern with jewelry photography and what I am about to share here is from the experience and point of view of a photography dummy who needs effective and hassle-free pictures.
Effective in the sense that pictures should turn out clear without a great disparity in the representation of colours sans photoshop. I'm doing everything myself, every single aspect of it. So, I simply do not have the time for any editing work in photoshop. I pretty much want it to be A-okay on the first few take.
Yeah, some might reckon I'm expecting too much since I'm not even familiar with photography to begin with but then I seriously can't be bothered with any editing job. It HAS to be okay during takes. All those post editing work is just way too much of a hassle for me.
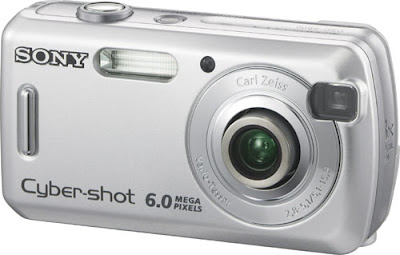
The first camera I got, which was also the first digital camera I ever own, was SONY CYBERSHOT DSC600.

Since everything was the first, unsurprisingly, the pictures that I manage to produce were also very first timer; all lacking in all that I was hoping it to be.

I had a problem handling the flash issue, taking clear close up pictures and the background colour. It took me approximately 2 years to finally figure it all out. Not to say that I'm an expert already or that the pictures I'm producing now is brialliant on its own but I believe pictures taken these days were of much acceptable clearness and presentable.
You have no idea the amount of research taken before I came to this conclusion but basically, to keep things simple, this is the three tips to keep in mind when photographing jewellery.
- Lighting
I prefer to take pictures with the flash off and depending solely on natural light source. I've tried using fluorescenr light and those day light bulbs and adjusting the white balance in the camera accordingly and the pictures still turn out with weird colours.
I finally settled with natural light and adjusting the exposure value in the camera instead.
Let me first clarify what natural light means. Basically, it just means sunlight. :)
You don't necessarily need direct sunlight shone onto the piece. Just as long as the brightness around you is from sunlight and not any artificial(?) light source.
This is how I normally do it
I usually take my pictures outside at the porch but you don't necessarily need to move a table and chair outside. I already have a table outside my porch. I just moved a stool outside. =P
I've also try doing it next to the window with the shutters open so that I get as much sunlight in as possible.
The next thing you do is to adjust the settings of your camera. The feature (or whatever you call it) that we will be adjusting is the exposure value which is normally marked as EV in your camera. What changes the exposure value will make is in brightening your pictures or making it darker.
The EV icon is acompanied by the + and - sign. So if you want to brighten the picture, increase the value of EV and reducing it to make the picture darker. Take the pictures below as an example.I think this was taken with EV +1.3
And I think this was with EV -0.3
See the differences between the two pictures? While the overall picture brightens and darkens the colour doesn't change too drastically and if I'm allowed to be bold enough to say that it's true even to the actual colour.
But be carefull not to increase the EV value too high that the picture might end up overexposed.
As you can see in the outdoor picture before this, you'll realize the overall picture is quite dark. Well, that was taken with EV value 0.0, which should technically be the actual lighting condition (I think!). It was actually raining at the time that picture was taken.
It was indeed rather dark at that time.
But looking at this pictures taken of the ring, it sure doesn't look like it, does it?
That is why I've always prefer reliance on natural light source rather than artificial ones eventhough the lighting might poor because you always have the EV to manipulate! :D - Macro
This is not the Macro hypermarket, mind you. =P I think they're no longer in operation anymore as well, aren't they? If I'm not mistaken, I think Tesco has taken them over or something. Anyway, I'm digressing already.....
Alright, the macro here is one of the specification of the camera. You will need a camera with this function in order to take clear close up pictures of your jewelleries.
You don't need any special camera for this function. Most camera have them now I think, especially the Canon ones but nevertheless, it's always better to check beforehand.
The Sony DSC600 I got haven't got this function, which was why I've had a hard time capturing clear pictures.
It was not until speaking to my brother about it that I learn about the macro function of the camera. So, make sure you have the camera set to the macro function before snapping away.
p/s: I later on changed my camera to RICOH Caplio R7.
- Background
Okay, I'm a bit mixed when it comes to the choice of colour for the background. I started off with black.....
And move on with beige......
But finally settle with white.
I've seen some people using very nice background. Patterned paper and even with props and all that but I just can't pull them off.... It's obvious that I'm failing miserably here... -___-
Which is how I finally ended up with the white background.
I find that a white background is almost a fool proof for a beginner to come up with professionally taken pictures. Well, at least I think it is. :P
So, having decided on the colour of the background, the next you might want to consider is the type of material that you are going to use for your background.
As you can see from my earlier pictures, I was using cloth for the background but for the white background from the recent pictures, I uses paper.
What paper, you ask?
Poster paper. :)
How so?
Well, turn to the back.
Why poster paper?
Well, for one, they are big enough. Secondly, they are more often than not made from high quality paper and if you should realize, macro function picks up even the slightest detail on close up. So, a good quality paper shows a nicer sheen.
Like the one I'm using here has got a glossy sheen which is why in some pictures, it actually shows.
No particular reason other than for the aesthetic aspect of the picture. :P Movie posters would be great too because those would be big enough but you will need to look for those with one blank side though. Go check out from TGV or GSC. I'm sure they won't mind sparing you some. After all, they will be throwing it away after a movie finishes its running , right?
Well, these are just some of my suggestions which may or may not work for you. This is the conclusion that I come to after experimenting with different method.
Most of the serches I made on the internet suggested the use lightbox, which is great for photographing jewelleries indoor, something admittedly which is a fallback of the method I've just explained above.
I've read that you can buy these lightboxes and unsurprisingly, they are rather costly. You can also make them yourself, which I've also tried based on some instructions I've found but it didn't quite work at all.
So, that's a little something that I still need to figure out.


0 hollers:
Post a Comment